#1 in the hardware

        ||                                          || 
        ||          ||              ||    ||               ||      
  ||   ||          ||                         ||    ||    ||      ||    ||    ||    ||
  ||   ||    ||          ||          ||          ||    ||      ||    ||          ||
  ||   ||    ||    ||    ||    ||    ||    ||                  ||    ||    ||    ||
  ||   ||                                                                              ||
  ||                                                                                   
  ||                                                                              
  ||                                       
  ||               ||    ||          ||    ||    ||    ||      ||    ||    ||          ||
  ||   ||    ||    ||    ||    ||    ||    ||          ||    ||      ||    ||    ||    ||
  ||   ||    ||    || a  || series   || of || zines    ||    ||    ||      ||    ||    ||
  ||   ||    ||    ||    ||    ||    ||    ||    ||    ||    ||      ||    ||          ||
  || inputs  ||     <--      ||      <--   ||       <--    ||      <--     ||  inputs  ||
  ||         ||   hardwares  ||       OS   ||  softwares ||    users ||      ||
  || outputs ||      -->     ||       -->  ||    -->     ||       -->  ||  outputs ||  ||
  ||   ||    ||    ||    ||    ||    ||    ||    ||    ||    ||      ||
  ||   ||    ||     a gateway for creatives to their hardware and terminal         ||  ||

A DIY hardware, built at home from a raspberry pi, and old tablet and a second-hand keyboard

Welcome !

Hardwares become a subject every 5 years, when the previous one collapses from planned obsolescence. Their qualities are checked when purchased, but forgotten through time, shadowed by the shininess of softwares, which absorb most of our digital attention and care. In fact, whenever a software is updated, leaving our computer outdated : we would rather change our device than the software (our tool).
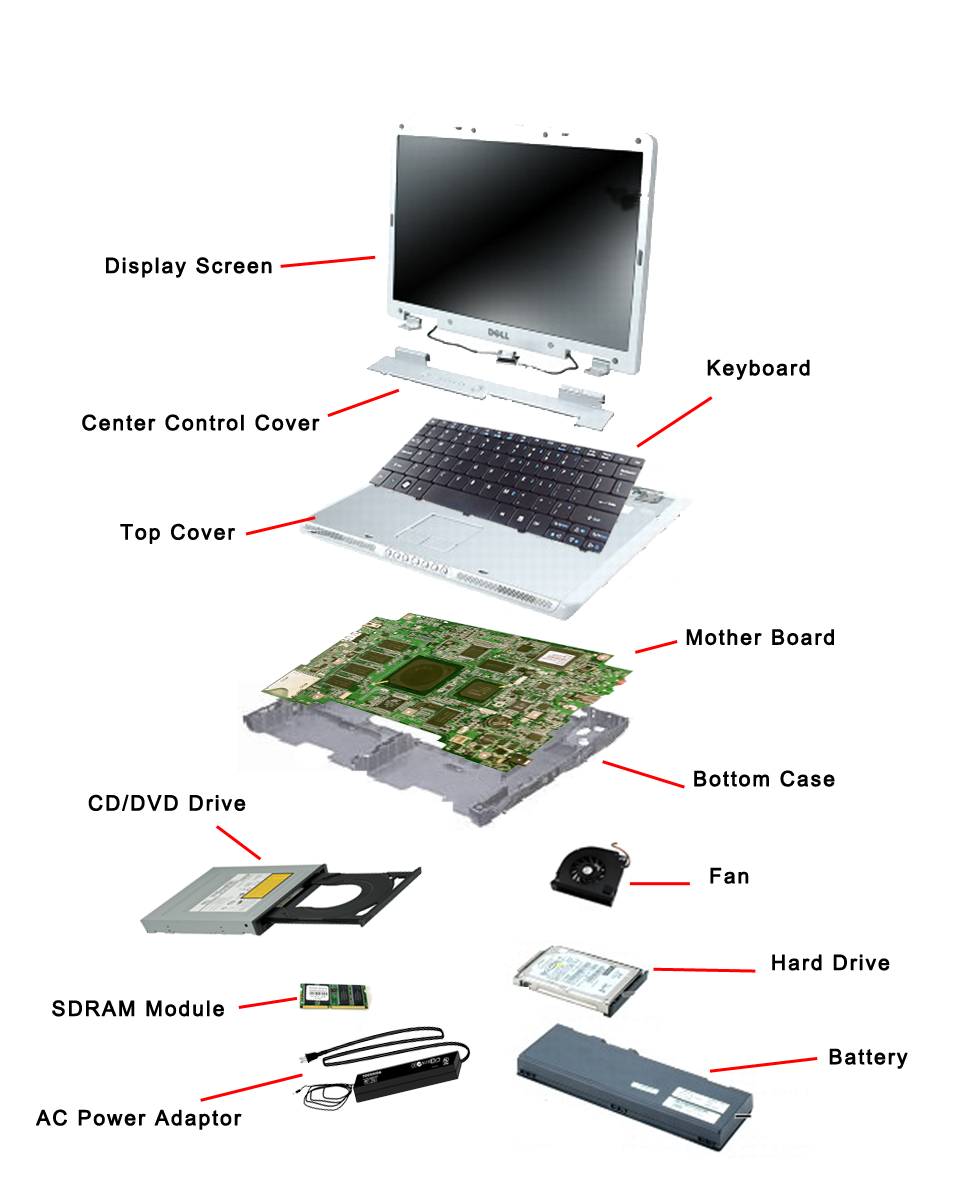
But on the contrary to softwares, hardwares embrace the reality of dirtiness, break-ability and have a tangible environmental impact. It means they are much more understandable, as existing in the physical realm. They can be opened and dissected to reveal their inner mechanism. Looking at hardwares from a low-tech approach, we have a lot to learn from them.

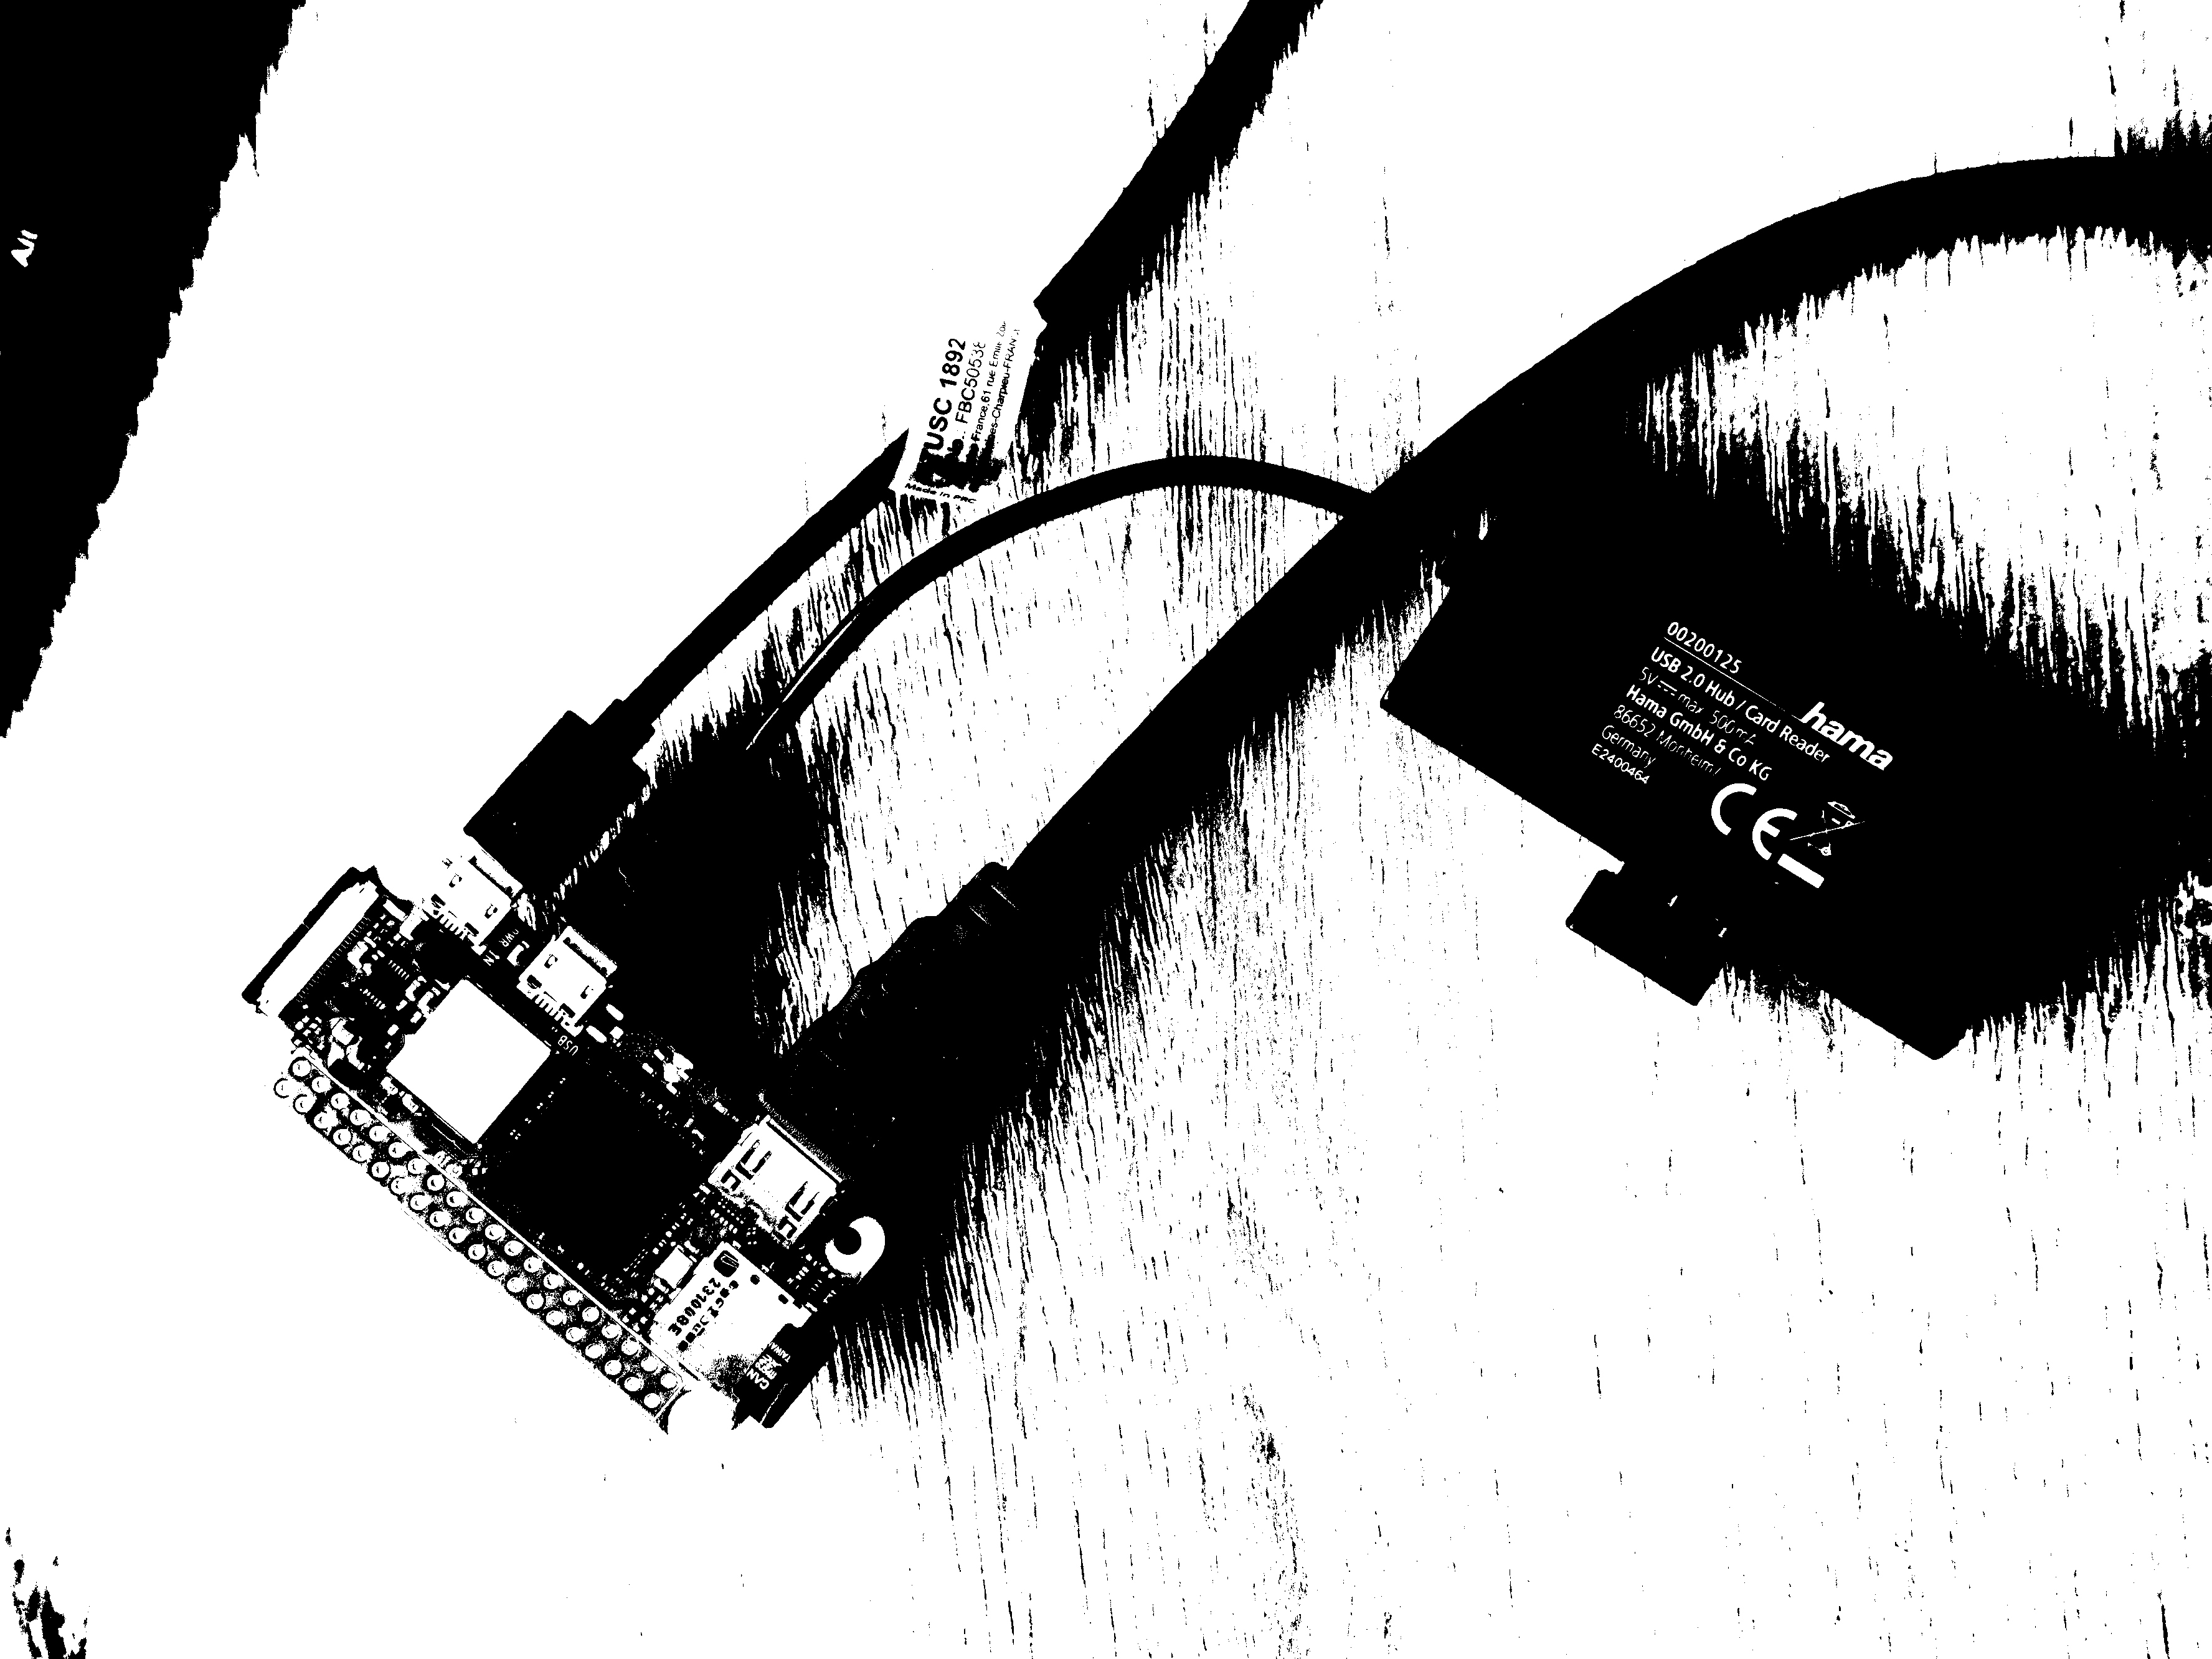
This zine #1 has been built from the hybridity of a tiny DIY computer and my 12 years old Macbook, trying to take advantage of both. It explains how to build the a diy computer and the value of looking closer to these hardwares.

#1 hardware components

Basics first. Let's start by diving in a basic understanding of which components make our machine works.

Hardware refers, in fact to all the physical components of a computer system which collectively work to process input and deliver output based on user instructions.

Central Processing Unit (CPU) : often called the "brain" of the computer, the CPU processes instructions from programs and performs calculations. It handles all the logic and control tasks.

Motherboard : The main circuit board that connects all components of the computer together, allowing communication between the CPU, memory, storage devices, and peripherals.

Memory (RAM - Random Access Memory) : Temporary storage that holds data and instructions that the CPU needs while performing tasks. It is fast but volatile (loses its contents when the computer is turned off).
-> important to check for the speed (8 - 32 Go)

Storage (HDD - Hard Disk Drive / SSD - Solid State Drive) : Permanent storage for the computer’s data, programs, and operating system. SSDs are faster and more reliable than traditional HDDs.

Power Supply Unit (PSU) : Converts electrical power from an outlet into usable power for the computer’s internal components.

Graphics Processing Unit (GPU) : Specialized processor designed to accelerate graphics rendering. Critical for gaming, video editing, and tasks involving visual data processing.

Cooling Systems (Fans) : Manage the temperature of critical components to prevent overheating and ensure efficient operation.

Input Devices : Hardware used to send data to a computer (e.g., keyboard, mouse, scanner, microphone).

Output Devices : Hardware used to receive data from a computer (e.g., monitor, printer, speakers).

Networking Components : Devices that allow the computer to connect to a network or the internet (network cards, Wi-Fi adapters).

cut view on a laptop basic components, from labdoo.org
in practice

#2 getting to know your computer

All these components are a part of your computers but they probably vary from others in capacities, power and ressources. It might be interesting to know what you are working with, especilly when downloading softwares or libraries. It enables you to knpw what is possible and where are the limits.
How to know more about your hardware ?

On Mac

Apple menu > System Settings > click General (you might need to scrool down)

On Windows

Settings > System > click on About (you might need to scrool down)

                              ^^^^^^^^^^^^^^^^^^^^     
                ^^^^^^^^^^^^^^^                  ^     
                ^                          ^^^^^^^     
                ^ ^^^^^^^^^^^^^^^ ^^^^^^^^^^    ^^     
                ^ ^                             ^^     
                ^ ^                             ^^     
                ^ ^                             ^^     
                ^ ^                            ^^^     
                ^ ^                            ^       
                ^ ^                            ^ ^     
                ^^                             ^ ^     
                ^^                            ^^ ^     
                ^^^^^^^^^^^^^^^^^^^^^^     ^^^^  ^     
                ^^^^^^^^^^^^^^^^^     ^^^^^^     ^     
            ^^ ^^   ^     ^^     ^^^ ^^^^^^^^    ^     
        ^^^     ^^^^  ^^^    ^^^     ^^^    ^^^^^^    
      ^^^     ^^   ^^^^  ^^^^      ^^^    ^^^    ^    
    ^^^      ^^     ^             ^^^     ^^      ^^   
  ^^^                          ^^^                  ^  
  ^ ^ ^^^^^^ ^^^^^^^^^^^^^^^^^^^^^^^^^^^             ^^
                                        ^^^^^^^^^^^^^^
          
to fill in

your personal computer ID card

Name : .................................................
Storage : ........................................................................... occupied : ...................
RAM : ........................................................................... occupied : ...................
Processor : .................................................
System : .................................................
Graphic Card : .................................................

#3 a survival guide for old hardwares

Devices' impacts on the Planet

The digital sector represents 3.4% of global greenhouse gas emissions in 2025, 2 times Canada's carbon footprint. And 70-80% of the emissions come from the fabrication of the devices (tablets, computers, phone, etc). The last percentages are 16% from data centers (data storage for internet, personal use, ai, etc), and 5% from networks (connection, transport, infrastructures, etc).*

Altough a hardware can last over 20years, an average lifespan of a computer is 3 to 5 years. And this is mainly due to the evolution of softwares, which becomes heavier after each updates. They require stronger and more powerful hardwares. Users are left with no choices than adapting their machine, to the softwares, which has a massive impact.

So the most sustainable move, we can integrate in our practice is the make last long our hardwares.

in practice

some tips to make it last

The two things to fight against, to use it to its maximum, is the tiredness of the machine and the obscolescence of the softwares.

To care for the machine, here a few tips:

  • refresh your stockage space by moving your heavy files on a hard disk regularly
  • check on your RAM, by avoiding to run too many heavy actions at the same time
  • check your activity monitor, to see how the CPU is going
  • if some pieces seems to get old, check on the ifixit website, an infinite ressource of tutorials for fixing any hardware !

To avoid succumbing to software obsolescence:

  • for every softwares, it is always possible to find its oldest version online
  • do not rely on one tool, be flexible to change from an alternative software
  • avoid commercial softwares, or hack the oldest versions
  • learn how to use your terminal for basic actions, reduce the weight on the machine

#4 build a diy hardware

A few years ago, Corentin de Chatelperron from the Low-tech Lab, posted a tutorial of a so-called "low-tech" computer. Reduced to a little raspberry-pi well-connected to second-hand screen and keyboard, the home-built device was created for less than 50 euros.
The "low-tech" designation has been quite argued in his community. The raspberry-pi is a powerful high-tech piece as it holds more power in 10cm2 than the first giant computers of the 80's. But if the low-tech is approached as a systemic spectrum, in fact this computer can be called so.

Why building such an hardware can be usefull, and then how can it be used for ?

Playing with components

Going through the process of finding the pieces and assemble them,is already a big step in gaining knwoledge over technology. We already get freedom from the device. In fact, each pieces is known for its function, and it has been personnaly sourced. And the pi assemblage does not fixed items in place, in any box. All of this makes the components easily replaceable if something goes wrong.

The pi is cheap (~20e) because it is a computer reduced to its minimum. No fan, no battery. It has to be plugged-in to work, or an exterior battery can be of course added. We have a very minimalist hardware.

Already-owned pieces can be used in its building, which reduce the amount of new items. It reinforces the flexibility of the tool, which is built only for a specific use. I used my grand-father's old tablet, which is still used as it, when it does not become a screen, or my personal sd card reader (normally used for my camera) to connect the keyboard.

Gaining awareness on GUI power and speed

The computers has a very little power and capacities. It runs on a 64GB sd card. On it, I can’t watch a movie, or scroll through a HD pictures gallery. On the pi, I can choose between a Desktop Graphic Interface (VNC) or to stick to the CLI (command-line interface) in the terminal. The speed difference of the computer using these two is striking. The graphic interface asks a bit too much to the pi, as the terminal gives smooth and fast results. Great reminder on how much power these interfaces require and that are not always necessary but a matter of habits ;).

and so ?

This experimentation can be taken as great step in understanding better the hardware, as a physical object. Although its uses can seem a bit limiting, it can still be a nice challenge to start using it for some tasks !

Map of the diy hardware and its components

How to connect all the elements to the raspberry-pi ?

  • PWR : micro-usb cable to a plug (for electricity)
  • USB : micro-usb cable to keyboard and mouse
  • Card reader : the sd card gets inside
  • Micro-HDMI : micro-hdmi cable connects to the videocapture adaptator which connects to the screen (the tablet)
  • ON THE SCREEN DEVICE : install the "nExt Camera" app to use the tablet as a display.

Zoom on the pi connections

sources

  • Low-tech computer, by the Low-tech Lab , on wiki, 2023
  • How to use a tablet as a portable raspberry pi screen , by Les Pounde, 2021
  • What is hardware, by Tibor Moes , on the software lab, 2023
  • Impacts environnementaux du numerique dans le monde, third issue, by greenIT, 2025
  • A basic guide to identifying the major components in a desktop system, on the DELL website
  • Computer hardware, on the Geeksforgeeks website, 2025
  • Computer hardware, the wikipedia page